
Table of Contents
- Why You’ll Love These Cherry Oreo Balls
- The Secret to Perfect No-Bake Desserts
- How to Make Cherry Oreo Balls Step-by-Step
- Customizing Your Cherry Oreo Balls
- Storage and Serving Tips
- Key Takeaways
Key Takeaways
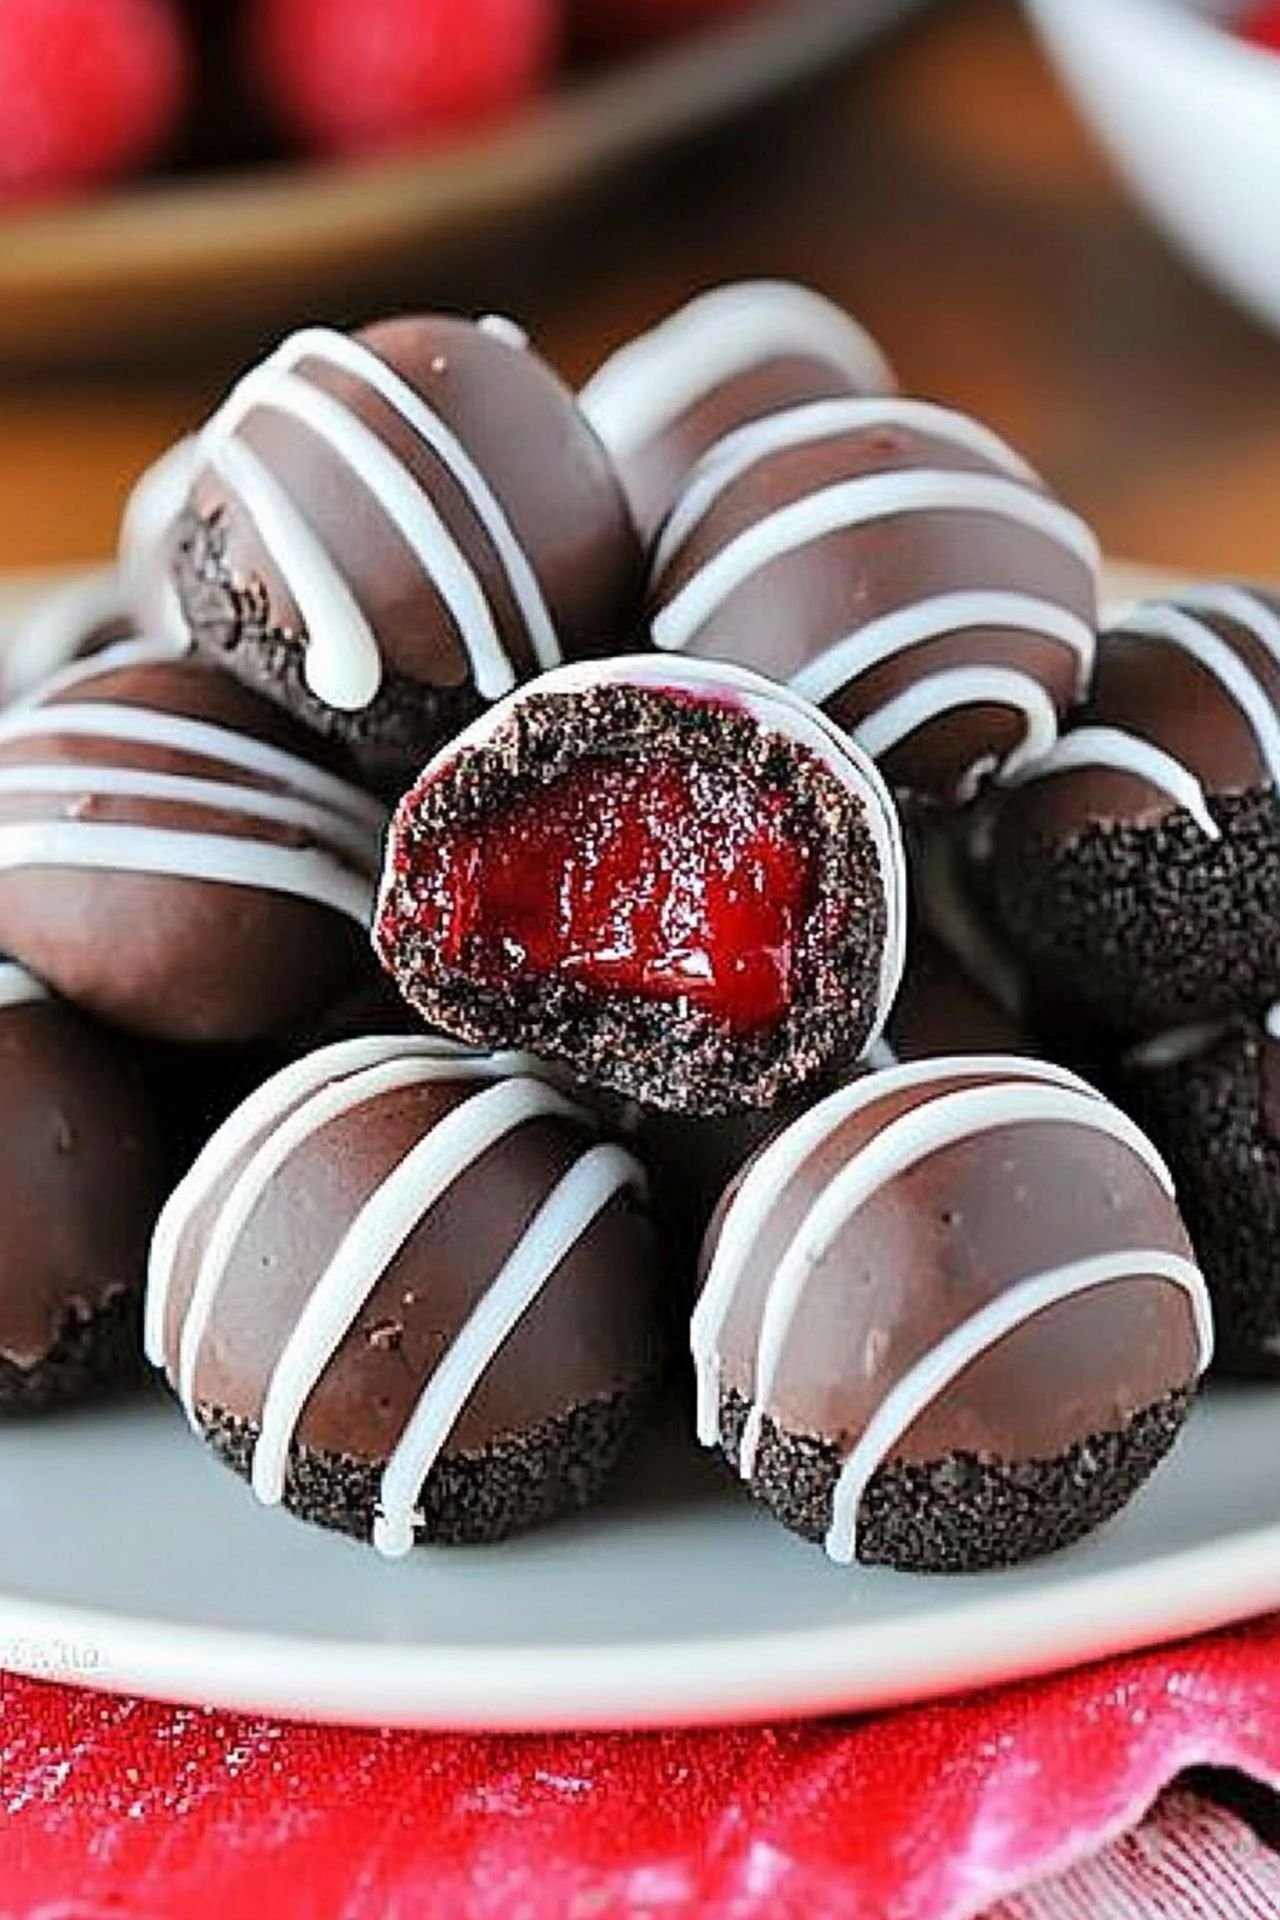
Cherry Oreo Balls are a simple, no-bake dessert that combines crushed Oreos, cream cheese, and maraschino cherries. These bite-sized treats are easy to make, customizable, and perfect for any occasion.

Why You’ll Love These Cherry Oreo Balls
If you love easy, no-bake desserts, then you’re in for a treat! These Cherry Oreo Balls are not only quick to prepare but also packed with rich chocolate and creamy flavors. Whether you need a last-minute party dessert or a fun recipe to make with kids, these delightful bites are perfect.

The Secret to Perfect No-Bake Desserts
No-bake desserts are all about convenience and flavor. The key to making perfect Cherry Oreo Balls lies in achieving the right consistency of the dough. Make sure your Oreo and cream cheese mixture is well combined and firm enough to hold its shape. Also, ensure the maraschino cherries are completely dry before rolling them in the mixture to avoid excess moisture.
How to Make Cherry Oreo Balls Step-by-Step
Making these no-bake treats is as easy as crushing, mixing, rolling, and dipping! Start by crushing Oreo cookies into fine crumbs and blending them with cream cheese. Wrap the mixture around a maraschino cherry to create a round ball. Freeze them briefly to firm up, then dip each ball in melted white chocolate for a smooth, delicious coating.

Customizing Your Cherry Oreo Balls
Want to get creative with your dessert recipes? Try adding a twist to these Cherry Oreo Balls by using flavored Oreo cookies, drizzling them with dark chocolate, or topping them with crushed nuts or sprinkles. You can even swap out the white chocolate coating for milk or dark chocolate to suit your taste preferences.
Storage and Serving Tips
To keep your Cherry Oreo Balls fresh, store them in an airtight container in the refrigerator for up to a week. If you’re making them in advance for an event, freeze them and simply let them thaw for a few minutes before serving. These bite-sized treats are perfect for holiday gatherings, birthdays, or just a fun snack anytime.
Final Thoughts
Betty Cooks brings you another easy and delicious recipe that you’ll love! These Cherry Oreo Balls are an effortless way to satisfy your sweet tooth without turning on the oven. Whether you’re making them for a special occasion or as a quick snack, they’re sure to impress.


Cherry Oreo Balls – A No-Bake Dessert Delight
Ingredients
- 1 package (14.3 oz) Oreo cookies
- 1 package (8 oz) cream cheese, softened
- 24 maraschino cherries, drained and patted dry
- 16 oz white chocolate or almond bark, melted
- Sprinkles or chocolate drizzle (optional)
Instructions
- Crush the Oreo cookies into fine crumbs using a food processor.
- Mix the crushed Oreos with the softened cream cheese until well combined.
- Scoop out small portions of the mixture, flatten them, and place a maraschino cherry in the center.
- Roll the mixture around the cherry to form a ball and place it on a parchment-lined baking sheet.
- Freeze the balls for about 20 minutes to firm up.
- Dip each ball into the melted white chocolate, ensuring it is fully coated.
- Place the coated balls back on the baking sheet and add sprinkles or drizzle with chocolate if desired.
- Let them set until the chocolate hardens, then enjoy!


Leave a Comment