Your Ultimate Guide to Homemade Ninja Creami Ice Cream: A Flavor Revolution
If you’ve ever wished for the magic of perfectly soft, creamy, homemade ice cream without the hassle of a traditional ice cream maker, you’re in the right place. At Betty Cooks (bettycooks.com), I believe incredible easy ninja creami ice cream recipes should be simple, accessible, and downright delicious. My personal journey with the Ninja Creami began with a simple goal: to make a perfect easy ninja creami ice cream recipes that could rival any artisanal scoop shop. This wasn’t just about freezing and churning; it was about unlocking a world of flavor possibilities right in my own kitchen, and today, I’m sharing that game-changing approach with you.
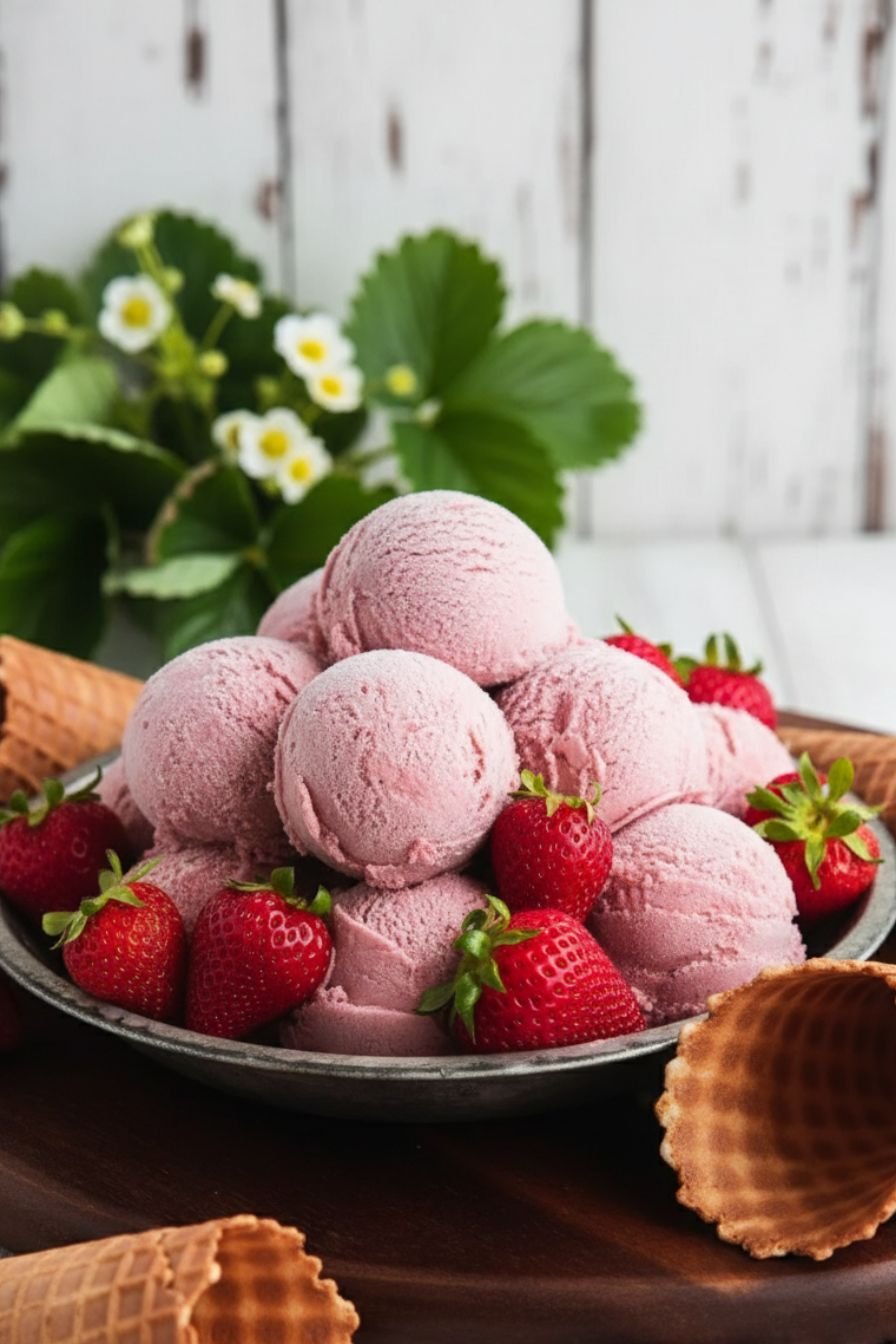
Table of Contents
- Why the Ninja Creami Changed My Ice Cream Game
- The Secret to Perfect Creami Texture Every Time
- Exploring Delicious Ninja Creami Recipe Variations
- Pro Tips for a Flawless Creami Experience
- Beyond Ice Cream: Creami Sorbet and Frozen Yogurt
- What to Serve With Your Homemade Treats
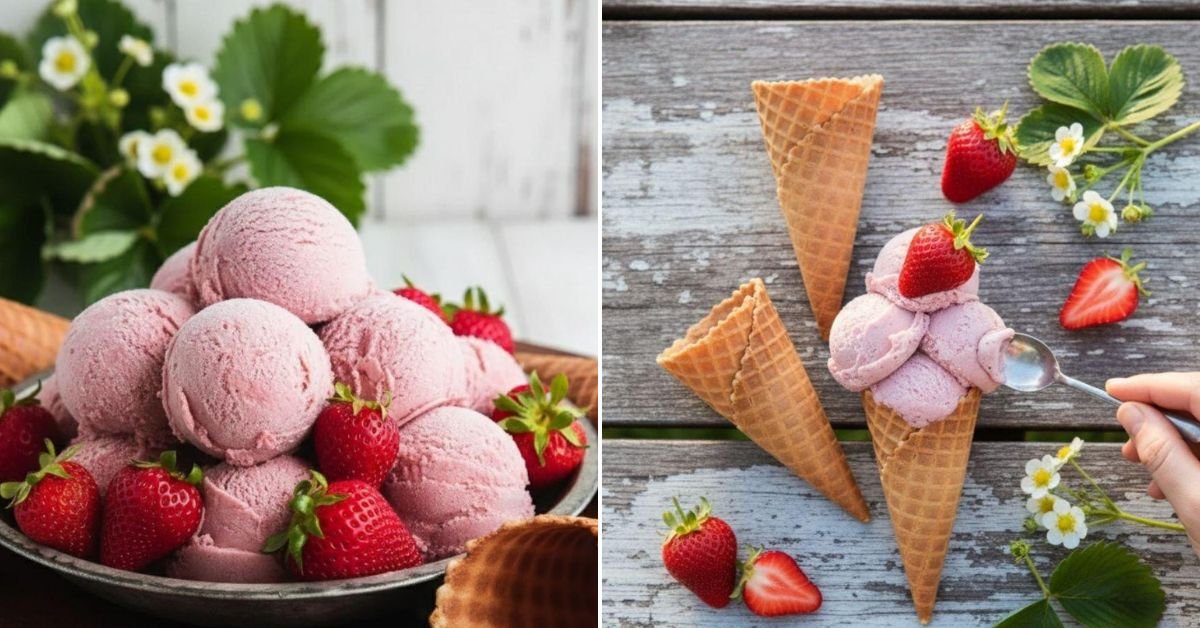
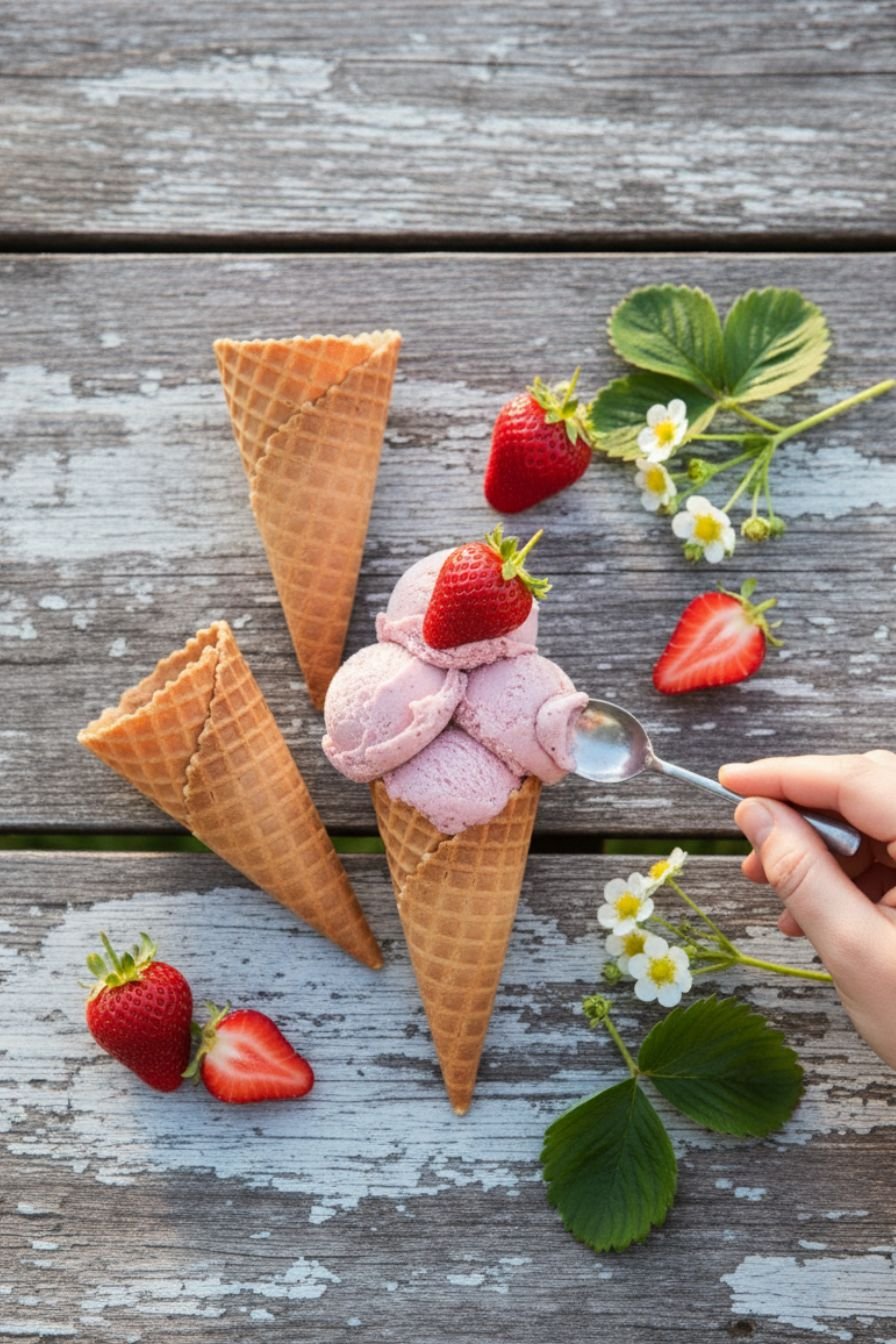
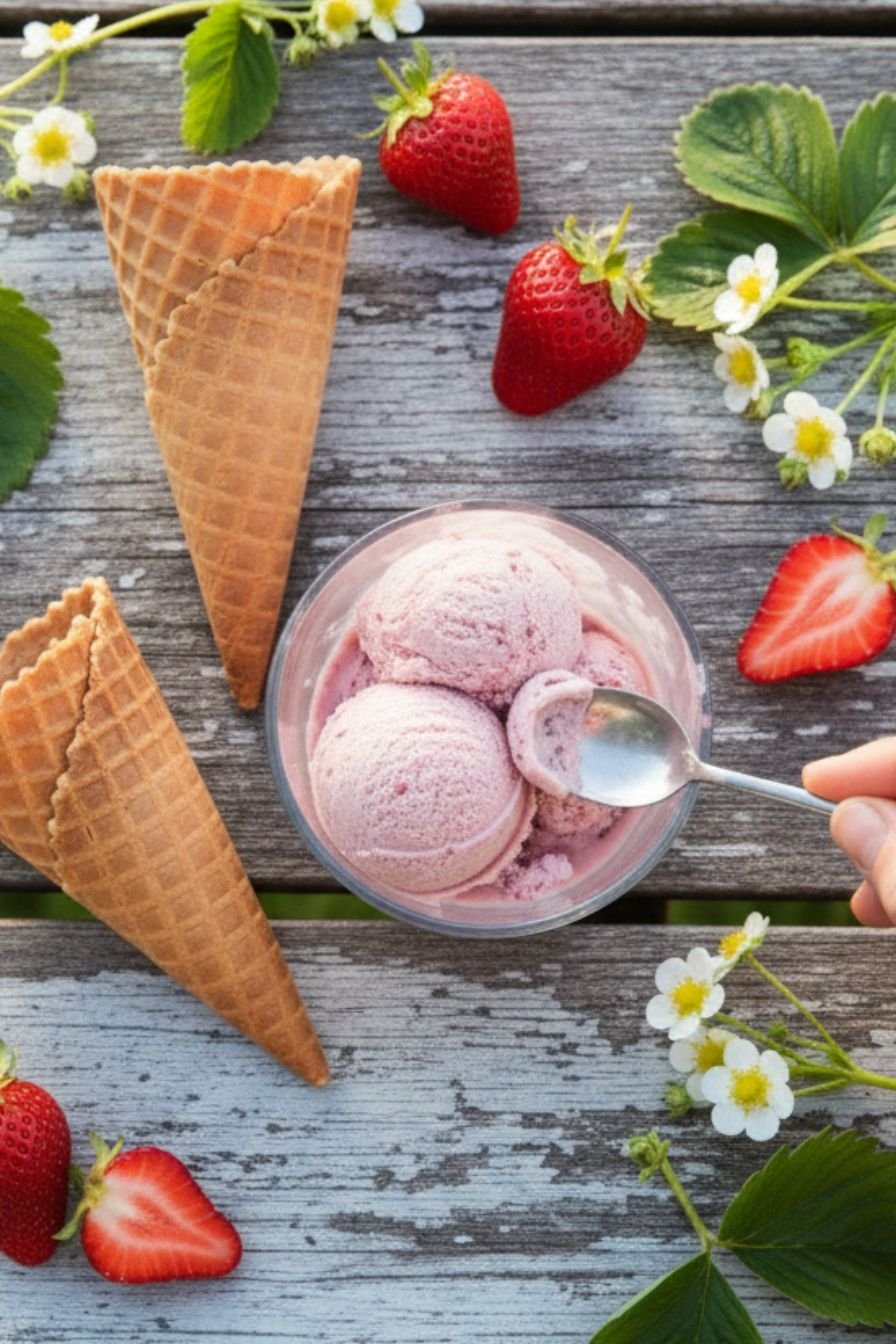
- The Full Recipe: Betty’s Strawberry Creami Ice Cream
- Notes & Tips for Your Ice Cream Success
Key Takeaways
- The Ninja Creami transforms solidly frozen ingredients into unbelievably creamy frozen desserts in just minutes.
- A proper base with the right balance of fat (from cream or milk), sugar, and flavorings is crucial for the perfect texture.
- Freezing the pint for a full 24 hours before processing is the non-negotiable secret to success.
- This machine opens up endless creative possibilities, from rich ice cream and refreshing sorbet to healthy protein-packed treats.
- These easy ninja creami recipes empower you to create gourmet-quality desserts at home with minimal effort.
Why the Ninja Creami Changed My Ice Cream Game
Before discovering the Ninja Creami, my attempts at homemade ice cream were a mixed bag. Traditional ice cream makers were fussy, required pre-chilled bowls, and often yielded icy results. The Ninja Creami is a revelation because it works on the opposite principle: it starts with a solidly frozen block and, with its powerful blade, shaves and mixes it into a creamy consistency. This means no last-minute planning for frozen bowls, and the results are consistently smooth. It’s the ultimate tool for anyone who loves the idea of creating custom, healthy, and indulgent easy recipes for dessert without any of the guesswork.
The Secret to Perfect Creami Texture Every Time
I’ve learned that the magic lies in the freeze. For any ninja creami ice cream to turn out perfectly, the mixture must be frozen rock-solid for a full 24 hours. This isn’t a suggestion—it’s a requirement. The machine’s blade needs a firm base to shave into delicate ribbons. If the center is still soft, you’ll end up with a chunky, uneven mix. Another key is the fat content in your base. Using a combination of heavy cream and whole milk provides the ideal structure for that luxurious mouthfeel we all crave in a perfect dessert recipe. Trust me, taking the time to get these fundamentals right makes all the difference.

Exploring Delicious Ninja Creami Recipe Variations
One of the best things about mastering easy ninja creami recipes is the creative freedom it brings. Once you’ve perfected the classic strawberry base, the sky’s the limit. Craving a healthy chocolate peanut butter cup delight? Blend cottage cheese, cocoa powder, peanut butter, and a touch of maple syrup for a high-protein, low-sugar treat. In the mood for a tropical escape? Puree ripe mango with coconut milk for a stunningly vibrant sorbet. The machine handles it all, from homemade cookie dough chunks to swirls of fudge. It’s your personal dessert lab, ready for endless easy ninja creami ice cream recipes experiments.
Pro Tips for a Flawless Creami Experience
- Let it Spin Twice: If your ice cream looks a bit crumbly after the first “Ice Cream” cycle, don’t panic! Simply run the “Re-Spin” function. This extra 30-60 seconds is often all it takes to achieve a dreamy, scoopable texture.
- Embrace Add-Ins: After processing, use a spoon to create a well in the center of your ice cream. Add in chopped cookies, candies, or fruit swirls, and use the “Mix-In” function for the perfect distribution without over-mixing.
- Keep It Level: Always store your Ninja Creami pints on a flat, level surface in the freezer. An uneven freeze can cause the blade to work harder and affect your final texture.
Beyond Ice Cream: Creami Sorbet and Frozen Yogurt
The Ninja Creami’s versatility is one of its greatest strengths. It’s not just for decadent, cream-based desserts. For a lighter, fruit-forward option, try making sorbet. My go-to method is blending frozen fruit (like berries or peaches) with a simple syrup or a splash of fruit juice until completely smooth, then freezing and processing. The result is a brilliantly flavored, dairy-free sorbet that’s incredibly refreshing. You can also create a fantastic frozen yogurt by using Greek yogurt as the base, sweetened with honey or agave. It’s a fantastic way to enjoy a satisfying homemade treat that feels a little lighter.
What to Serve With Your Homemade Treats
Presentation is the final touch that turns a great dessert into a memorable one. A scoop of your fresh strawberry Creami ice cream is wonderful on its own, but it becomes sublime with a few simple additions. I love to serve it in a chilled bowl with a drizzle of aged balsamic glaze and a few fresh basil leaves for a sophisticated twist. For a classic sundae, top it with hot fudge, whipped cream, and a sprinkle of toasted nuts. If you’ve made a sorbet, consider pairing it with sparkling wine for an elegant palate cleanser. These are the little details that make your family-friendly creations feel truly special.
The Full Recipe: Betty’s Strawberry Creami Ice Cream
Now that we’ve explored the world of possibilities, let’s get to the main event. This recipe is your foundational guide to creating that perfect pint of strawberry bliss. Remember, patience during the freezing stage is your best friend here. Gather your fresh (or frozen) strawberries, cream, and a few other pantry staples, and let’s make some magic.
Notes & Tips for Your Ice Cream Success
- Ingredient Swaps: Feel free to experiment! Swap heavy cream for full-fat coconut milk for a dairy-free version. Maple syrup or honey can be used in place of granulated sugar, though it may slightly alter the freezing texture.
- Texture Troubleshooting: If your ice cream is too hard after a re-spin, let it sit on the counter for 5-10 minutes to soften before scooping. If it’s too soft, it likely needed a longer initial freeze.
- Storage: For the best texture, enjoy your Creami ice cream immediately after processing for a soft-serve consistency. If you prefer it firmer, transfer it to an airtight container, press parchment paper directly on the surface, and freeze for 1-2 hours before serving.
- Flavor Boost: For an extra layer of flavor in your strawberry base, try macerating the fresh strawberries with a tablespoon of sugar for 30 minutes before blending. This draws out their natural juices and intensifies the fruit flavor.
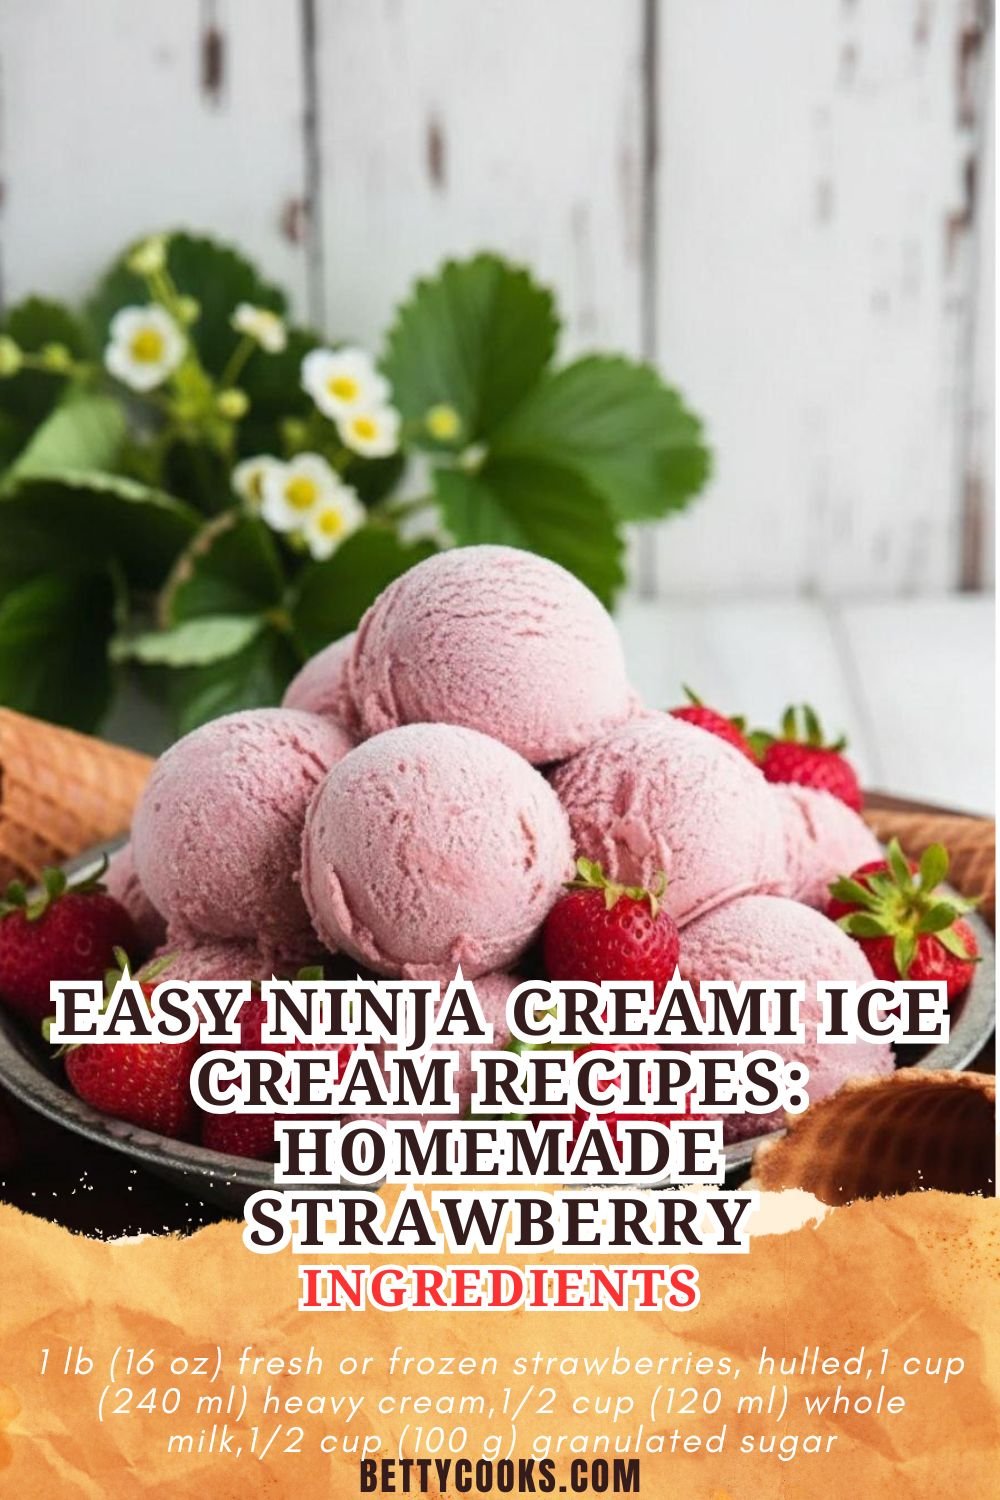

Easy Ninja Creami Ice Cream Recipes: Homemade Strawberry
Ingredients
For the Strawberry Ice Cream Base
- 1 lb (16 oz) fresh or frozen strawberries, hulled
- 1 cup (240 ml) heavy cream
- 1/2 cup (120 ml) whole milk
- 1/2 cup (100 g) granulated sugar
- 1 teaspoon pure vanilla extract
- Pinch of salt
For Serving (Optional)
- Fresh strawberry slices
- Whipped cream
Instructions
Prepare the Strawberry Base
- If using fresh strawberries, wash, hull, and slice them. If using frozen, allow them to thaw slightly.
- Place the strawberries in a blender or food processor. Blend until completely smooth to make a strawberry puree. You should have about 1.5 cups of puree.
- If you prefer a seedless ice cream, you can strain the puree through a fine-mesh sieve. Press with a spatula to extract as much liquid as possible. Discard the seeds.
Make the Ice Cream Mixture
- In a large bowl, whisk together the heavy cream, milk, sugar, vanilla extract, and salt until the sugar is mostly dissolved.
- Pour the strawberry puree into the cream mixture and whisk until fully combined and smooth.
Freeze in Ninja Creami Pints
- Pour the mixture evenly into two Ninja Creami pint containers, leaving about 1/2 inch of space at the top for expansion.
- Secure the lids tightly. Place the pints on a level surface in your freezer and freeze for at least 24 hours, or until the mixture is completely solid.
Process in the Ninja Creami
- Remove the pint(s) from the freezer. Take the lid off and place the pint container into the outer bowl of the Ninja Creami.
- Install the pint holder and outer bowl lid. Select the ‘ICE CREAM’ function and press the button to start processing.
- The machine will process the ice cream in stages. It will first blend and then ‘re-spin’ if needed. The ice cream is ready when it has a smooth, creamy consistency. This usually takes 2-3 minutes.
Serve Immediately or Re-freeze
- For soft-serve ice cream, serve immediately after processing.
- For a firmer texture, transfer the processed ice cream to a freezer-safe container, press a piece of parchment paper directly onto the surface, and freeze for 1-2 hours before serving.


Leave a Comment