Hey there, I’m Betty from Betty Cooks! If you’re on the hunt for an irresistible, fuss-free dessert that’s guaranteed to be a crowd-pleaser, you’ve found it. Today, I’m sharing my absolute favorite no-bake Oreo cheesecake—an easy dessert recipe that delivers incredible flavor with minimal effort. This creamy, decadent treat is perfect for busy weeks, last-minute parties, or whenever those sweet cravings hit. It’s the kind of simple dessert recipe that looks impressive but is surprisingly straightforward to make, proving that the best easy dessert recipes don’t require an oven.
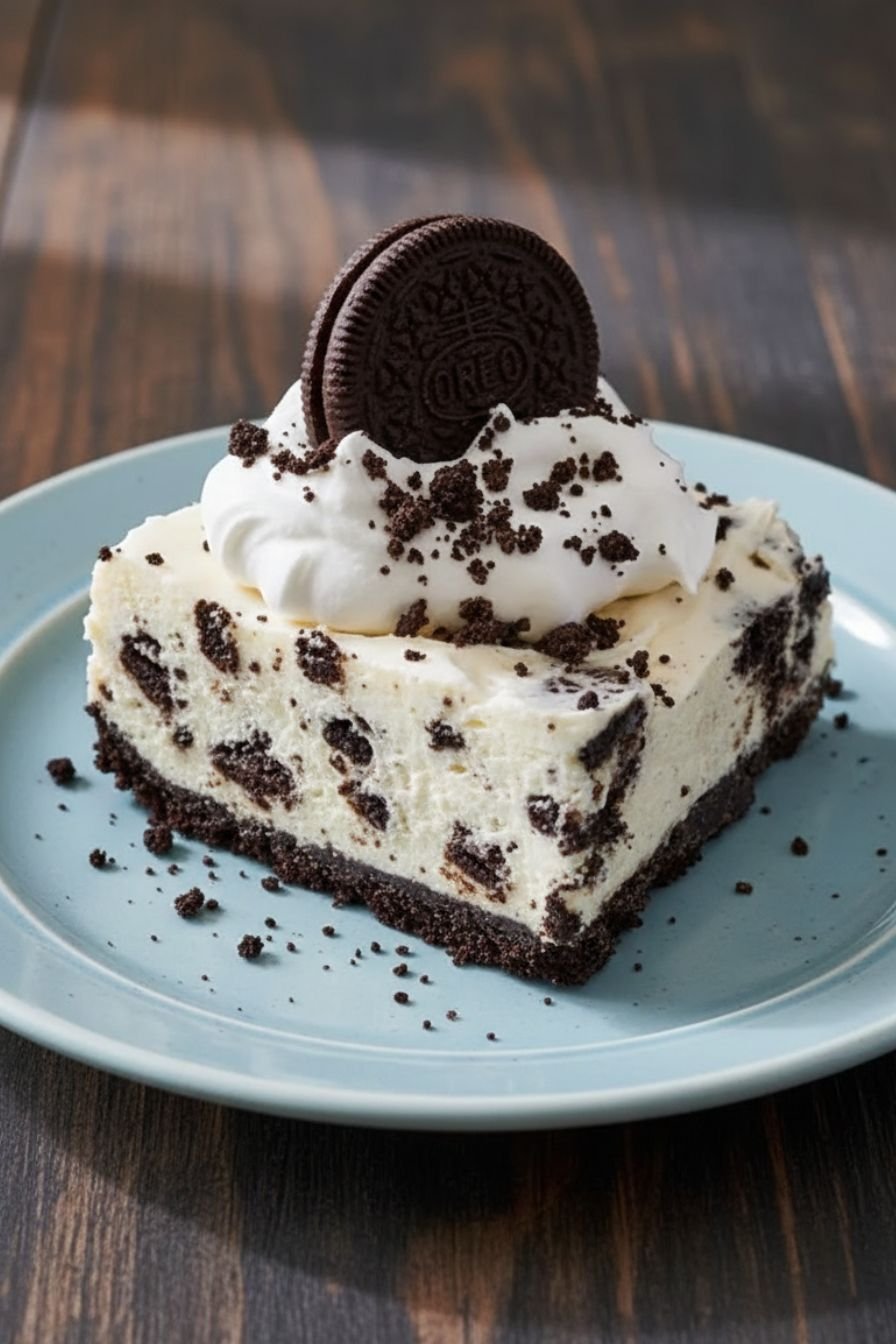
Table of Contents
- Why You’ll Love This Oreo Cheesecake
- My Secret for the Perfect No-Bake Filling
- Tips for a Flawless Oreo Crust
- Serving and Presentation Ideas
- Make-Ahead and Storage Tips
- Why This Is My Go-To Easy Dessert
- The Full Recipe
- Notes & Tips
Key Takeaways
- No Oven Needed: This is a true no-bake dessert, perfect for hot days or when you want to avoid heating up the kitchen.
- Incredibly Easy: With just a handful of ingredients and simple steps, it’s one of the easiest dessert recipes you’ll ever make.
- Family-Friendly Favorite: The classic combination of Oreos and creamy cheesecake is a guaranteed hit with both kids and adults.
- Perfect for Prep: Make it a day ahead for stress-free entertaining—the flavor gets even better as it chills.
Why You’ll Love This Oreo Cheesecake
Let’s be honest, sometimes you just need a quick dessert that doesn’t skimp on indulgence. This recipe is exactly that. It combines the nostalgic crunch of an Oreo cookie crust with a luxuriously smooth and creamy filling. Unlike traditional baked cheesecakes, there’s no risk of cracking, no water bath needed—just mix, chill, and serve. It’s the ultimate no-fuss dessert recipe for potlucks, birthdays, or a cozy family night in.
My Secret for the Perfect No-Bake Filling
The magic of this easy no-bake dessert lies in the texture. The key is ensuring your cream cheese is truly at room temperature before you start. This prevents lumps and makes for a silky-smooth blend when mixed with the sugar and vanilla. Gently folding in freshly whipped cream is what gives it that light, mousse-like consistency that sets perfectly in the fridge. For an extra bit of fun and texture, I love folding in some roughly chopped Oreos right into the filling.
Tips for a Flawless Oreo Crust
A great crust is the foundation of any good cheesecake. For this one, you’ll want to crush the Oreos until they resemble fine sand—a food processor makes this a 30-second job. The melted butter is what binds it all together. When you press it into the pan, really pack it down firmly and evenly. I like to use the bottom of a measuring cup to get it nice and compact. Chilling the crust while you make the filling helps it set, so it won’t crumble when you slice into your beautiful creamy dessert later.
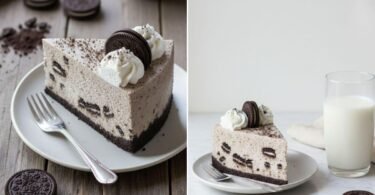
Serving and Presentation Ideas
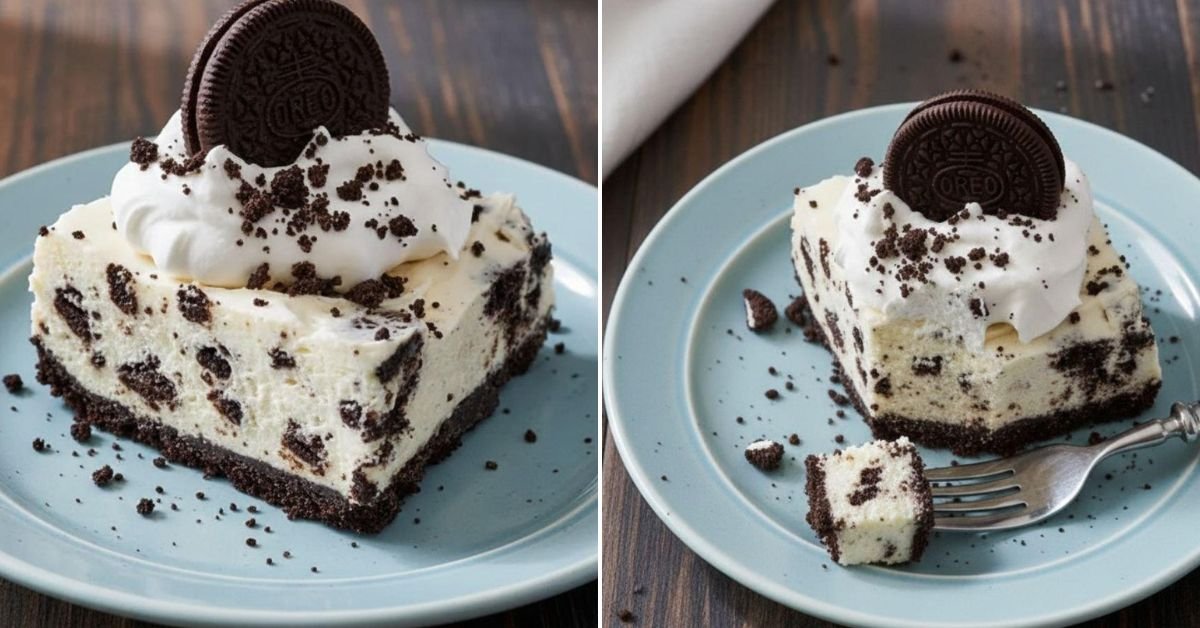
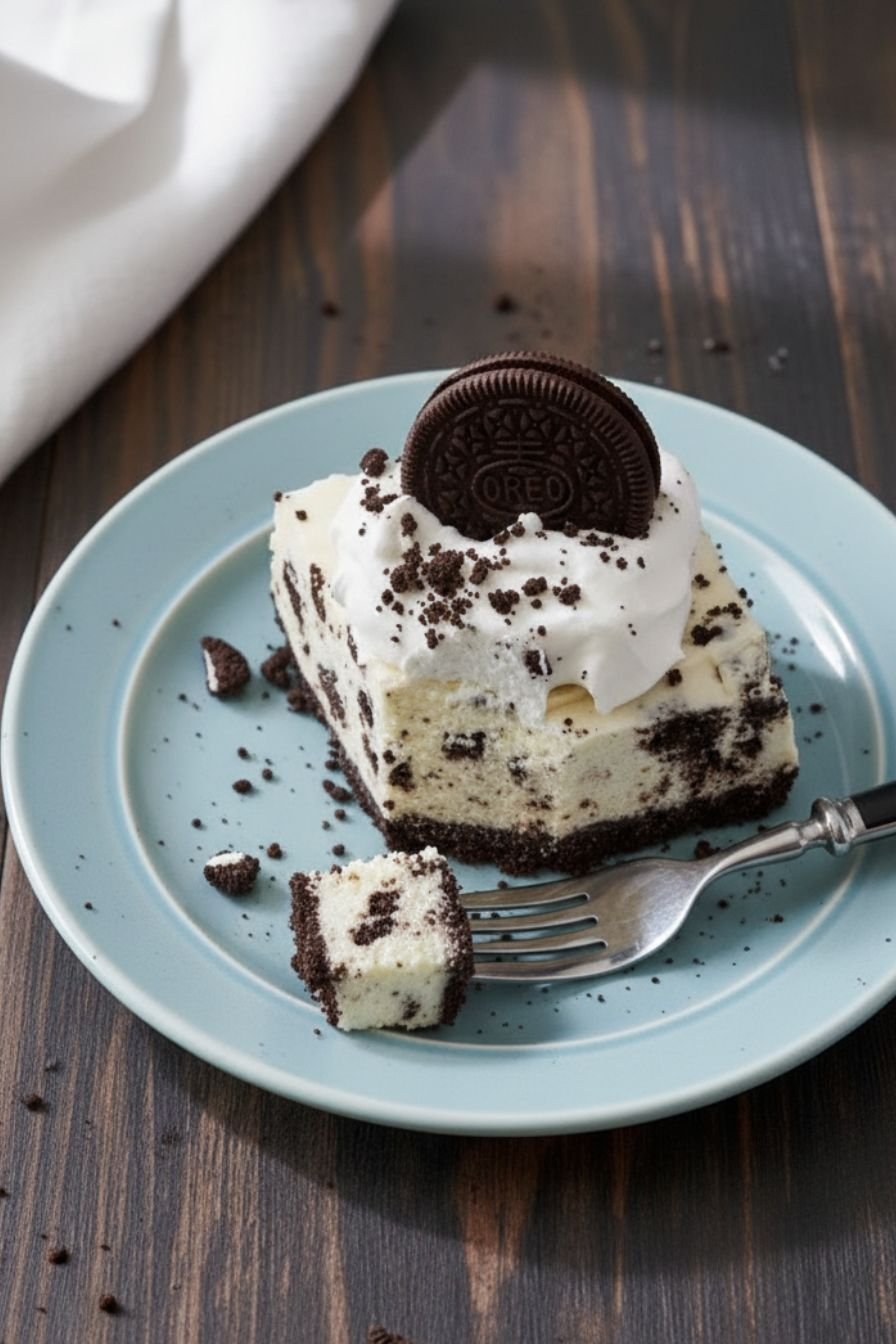
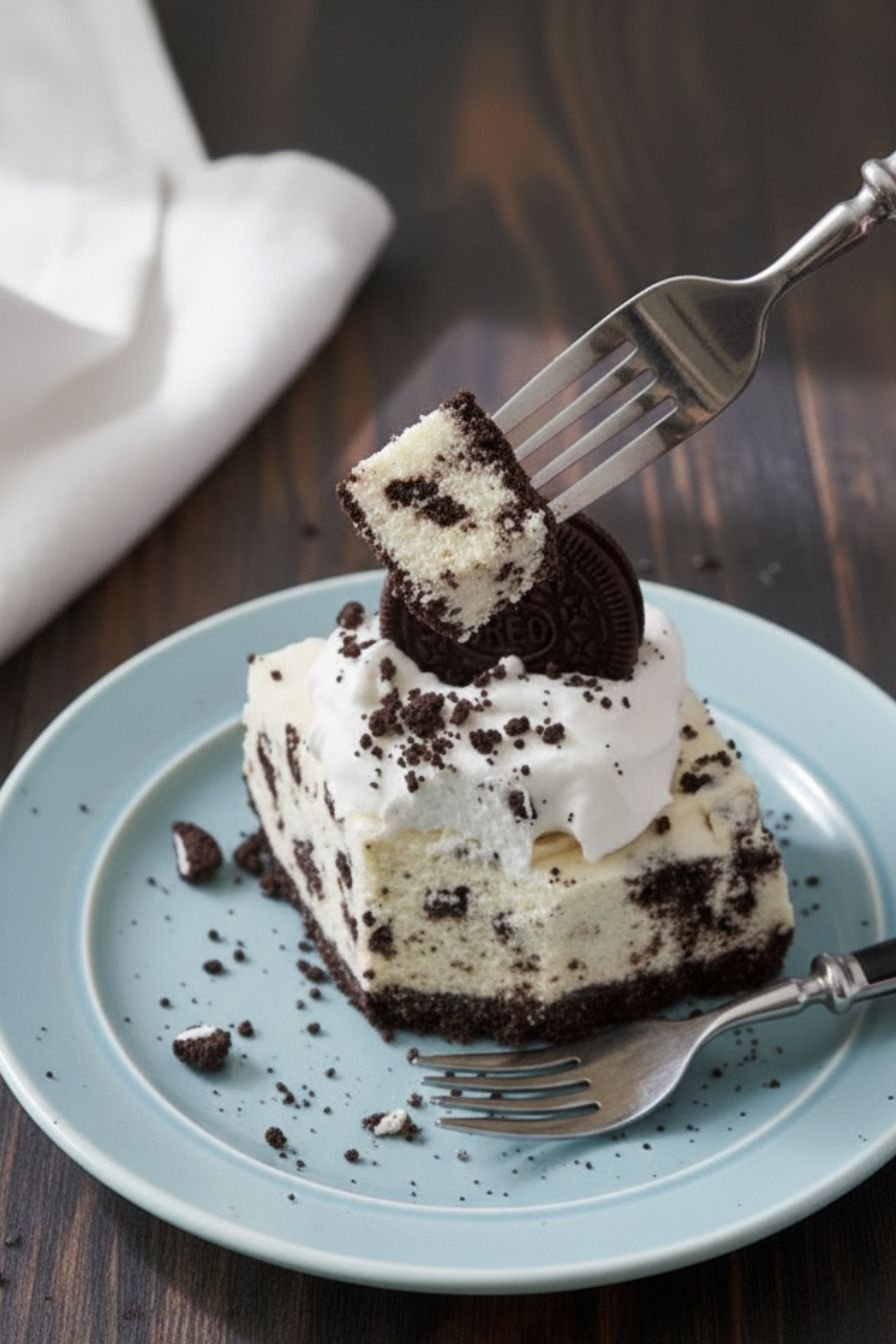
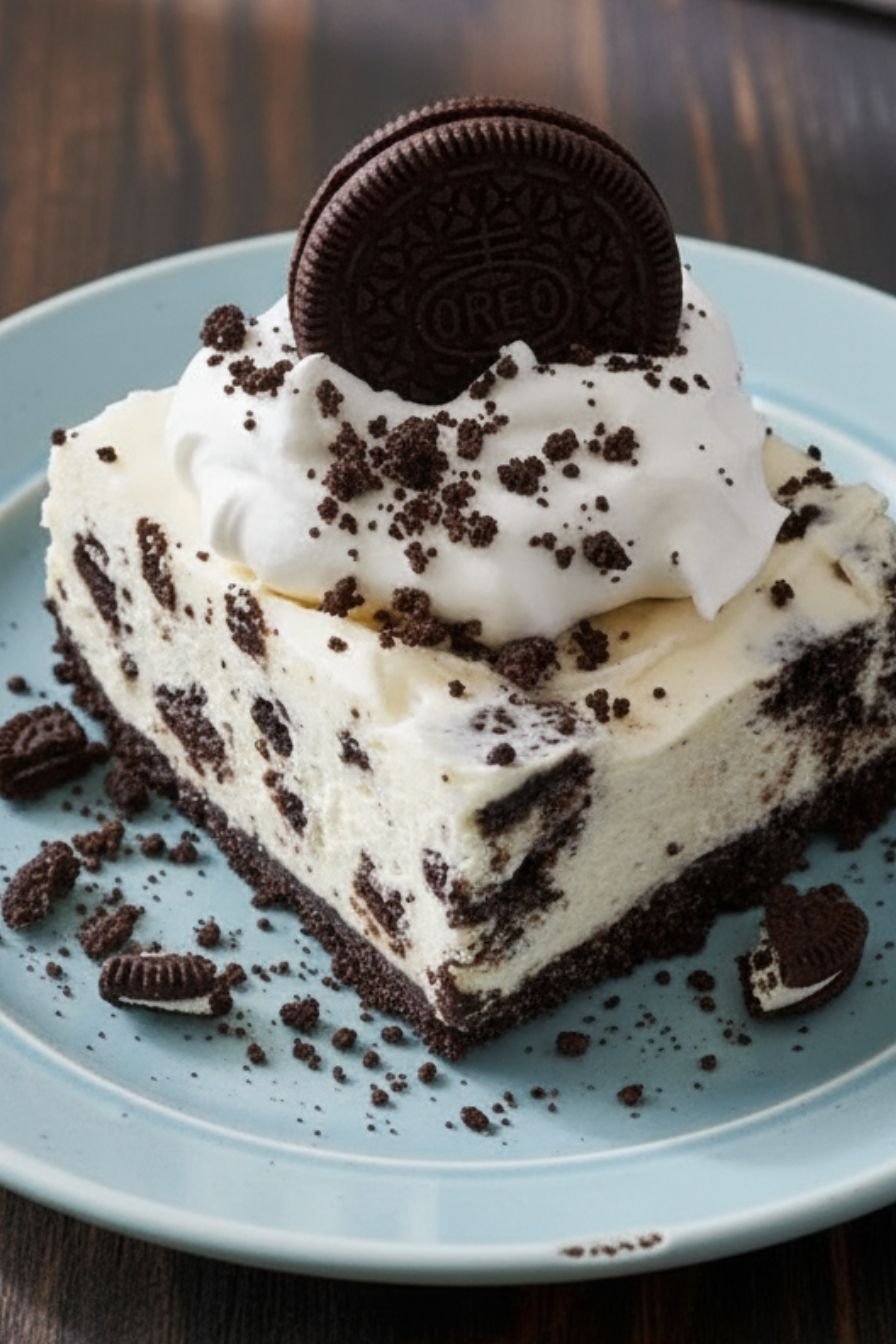
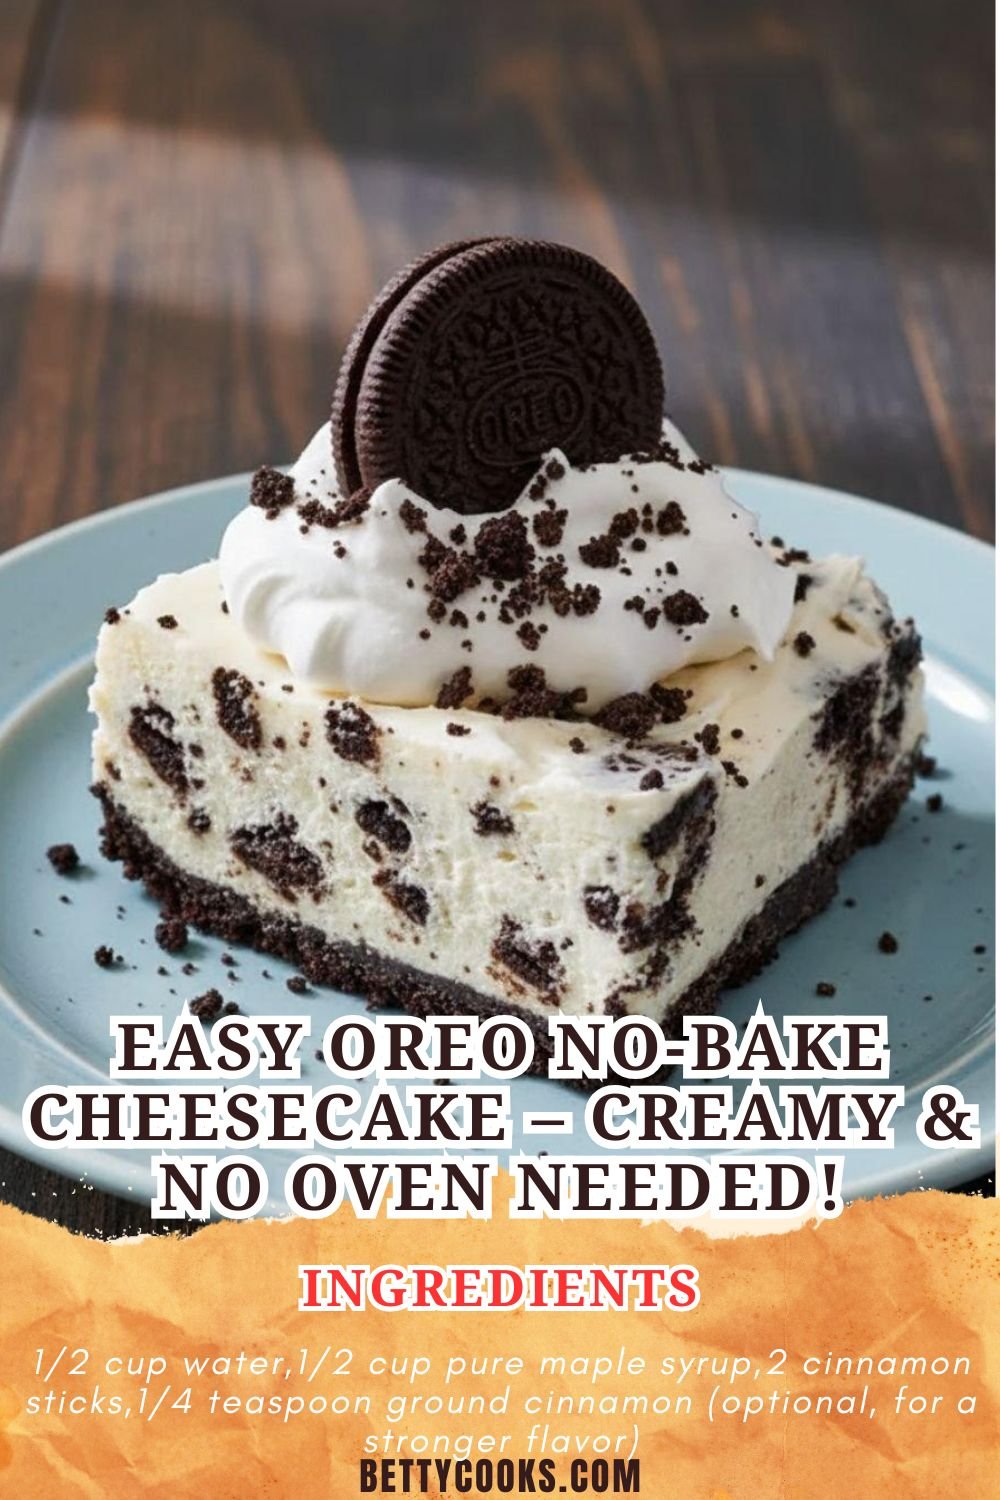
This cheesecake is stunning on its own, but a few simple garnishes can take it to the next level. A dollop of extra whipped cream, a sprinkle of Oreo crumbs, and maybe even a drizzle of chocolate or caramel sauce make it look bakery-worthy. For individual servings, you can layer the crust and filling in pretty glasses or mason jars for an elegant parfait. It’s such a versatile sweet treat that you can dress it up or down for any occasion.
Make-Ahead and Storage Tips
One of the best things about this recipe is that it’s a fantastic make-ahead no-bake dessert. In fact, I highly recommend making it the day before you need it. The extended chilling time allows the flavors to meld and the texture to become perfectly firm and sliceable. Once set, it keeps beautifully in the refrigerator, covered, for 4-5 days. You can also freeze individual slices for a sweet treat that’s ready whenever you are.
Why This Is My Go-To Easy Dessert
On my website, Betty Cooks, I’m all about recipes that deliver maximum flavor without maximum effort. This Oreo No-Bake Cheesecake embodies that philosophy perfectly. It’s reliable, universally loved, and proves that you don’t need to be a pastry chef to create something truly special. Whenever I need a guaranteed hit—whether for a blog post, a family gathering, or just because—this is the quick and easy dessert recipe I turn to time and again.
The Full Recipe
[The detailed recipe card with Title, Prep Time, Cook Time, Total Time, Course, Cuisine, Keywords, Servings, Ingredients, and Instructions would be inserted here in your post.]
Notes & Tips
[The Notes & Tips section from your recipe would be inserted here.]

Oreo No-Bake Cheesecake – An Easy, Creamy Dessert
Ingredients
For the Crust
- 24 Oreo cookies (crushed into fine crumbs)
- 1/4 cup unsalted butter, melted
For the Filling
- 16 oz (2 packages) cream cheese, softened
- 1 cup granulated sugar
- 1 tsp vanilla extract
- 1 cup heavy whipping cream, whipped to stiff peaks
- 12 Oreo cookies, roughly chopped (optional, for texture)
For Garnish
- Whipped cream
- Extra Oreo cookies or crumbs
- Chocolate sauce (optional)
Instructions
Make the Crust
- In a medium bowl, combine the finely crushed Oreo crumbs and melted butter until the mixture resembles wet sand.
- Press firmly and evenly into the bottom of a 9-inch springform pan or pie dish.
- Chill in the refrigerator while preparing the filling.
Make the Filling
- In a large mixing bowl, beat the softened cream cheese until smooth and creamy.
- Add the sugar and vanilla extract, and beat until fully combined and fluffy.
- Gently fold in the whipped heavy cream until no streaks remain.
- If using, fold in the roughly chopped Oreo cookies for extra texture.
Assemble the Cheesecake
- Pour the cheesecake filling over the chilled crust and spread evenly.
- Smooth the top with a spatula.
- Cover and refrigerate for at least 6 hours, or preferably overnight, until set.
Serve
- Before serving, garnish with whipped cream, extra Oreo crumbs, and a drizzle of chocolate sauce if desired.
- Slice and enjoy cold!


Leave a Comment